bonavita crib assembly instructions
Bonavita cribs are known for their versatility‚ safety‚ and sturdy construction‚ offering a reliable solution for parents seeking a comfortable and adaptable sleeping environment for their baby․
1․1 Features of Bonavita Cribs
Bonavita cribs are designed with safety and versatility in mind‚ featuring a sturdy construction that ensures durability․ They often include adjustable mattress heights and conversion options to a toddler bed‚ daybed‚ or full-size bed․ The cribs are made from high-quality materials‚ offering a classic and timeless design․ Many models come with stationary posts for added stability and a sleek appearance․ These cribs are easy to assemble and disassemble‚ making them a practical choice for growing families․ The included Allen wrench and clear instructions simplify the assembly process‚ ensuring a secure and stable setup for your baby․
1․2 Benefits of Using Bonavita Cribs
Bonavita cribs offer exceptional safety‚ stability‚ and adaptability‚ making them a top choice for parents․ Their durable construction ensures long-lasting use‚ while conversion options grow with your child‚ from infancy to adulthood․ The cribs are designed for easy assembly‚ saving time and effort․ With a focus on safety‚ Bonavita cribs meet rigorous standards‚ providing peace of mind․ Their versatile designs and classic aesthetics blend seamlessly into any nursery decor․ By investing in a Bonavita crib‚ families enjoy a practical‚ stylish‚ and secure sleeping solution for years to come‚ making it a worthwhile investment for any growing family․

Importance of Reading Instructions
Reading instructions ensures a safe and sturdy crib assembly‚ preventing errors and potential hazards‚ while guaranteeing compliance with safety standards for your baby’s well-being․
2․1 Safety Considerations
Ensuring your child’s safety is paramount when assembling a Bonavita crib․ Always follow the manufacturer’s guidelines to avoid hazards such as loose joints or sharp edges․ Proper assembly prevents structural instability‚ which could lead to accidents․ Use only the provided Allen wrench and a Phillips head screwdriver‚ avoiding power tools that might damage the crib․ Regularly inspect the crib for any wear or damage‚ and address these issues promptly․ Adhering to these safety measures guarantees a secure environment for your baby to sleep and grow․
2․2 Ensuring Proper Assembly
Proper assembly of your Bonavita crib is crucial for its stability and functionality․ Start by carefully unpacking all components and verifying that no parts are missing or damaged․ Use the included Allen wrench and a Phillips head screwdriver as specified in the instructions․ Follow each step methodically‚ ensuring all bolts and screws are securely tightened․ Double-check each connection to avoid misalignment․ If unsure‚ refer to the provided diagrams or online video guides for clarity․ A well-assembled crib ensures your baby’s safety and comfort‚ making the effort worthwhile․
Preparing for Assembly
Preparing for assembly involves carefully unpacking all parts and ensuring they are complete and undamaged․ Gather the necessary tools‚ such as the included Allen wrench‚ before starting․
3․1 Unpacking the Crib
Unpacking the Bonavita crib requires care to avoid damage․ Start by opening the box and verifying all components‚ including the mattress support‚ side panels‚ and hardware․ Check for any visible damage or missing parts․ Ensure the Allen wrench and Phillips head screwdriver are included․ Organize the parts neatly to streamline the assembly process and prevent losing any pieces․ Before proceeding‚ double-check the packaging to ensure no items are left behind․ This step ensures a smooth and efficient assembly experience․
3․2 Checking for All Parts and Tools
Before starting assembly‚ thoroughly check that all parts and tools are included․ Verify the presence of side panels‚ mattress support‚ rails‚ and hardware․ Ensure the Allen wrench (typically included) and a Phillips head screwdriver are available․ Review the packaging carefully to confirm no items are missing or damaged․ Check for loose hardware and ensure all components are accounted for․ This step is crucial to avoid delays during assembly․ Organize the parts neatly to maintain clarity and efficiency throughout the process․ Proper preparation ensures a smooth and successful assembly experience․
Tools Required for Assembly
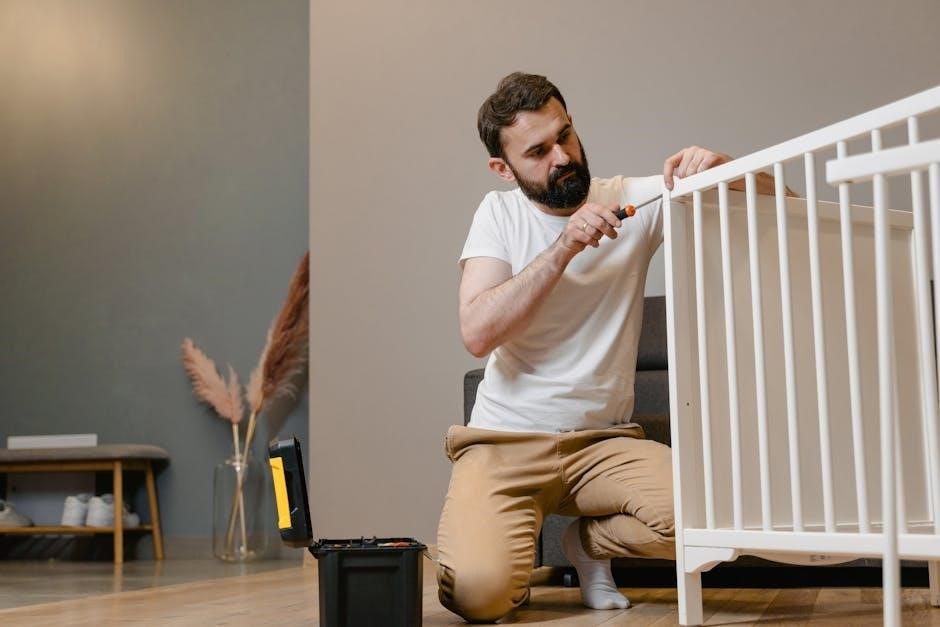
The Bonavita crib assembly requires an Allen wrench (included) and a Phillips head screwdriver․ Avoid using power tools for a safe and proper assembly process․
4․1 Allen Wrench (Included)
The Allen wrench is included in the Bonavita crib hardware box and is essential for securely tightening bolts during assembly․ It is specifically designed for this crib model‚ ensuring proper fit and torque․ Always use the provided wrench to avoid damaging the hardware or stripping screws․ Do not substitute it with other tools‚ as this could compromise the crib’s stability․ Store the wrench safely after assembly for future adjustments‚ such as converting the crib to a toddler bed or daybed․ Proper use of the Allen wrench is crucial for ensuring your baby’s safety and the crib’s durability․
4․2 Phillips Head Screwdriver
A Phillips head screwdriver is another essential tool required for assembling the Bonavita crib․ It is used to secure various components‚ such as side panels and mattress supports‚ ensuring a tight and stable fit․ Always use a standard-sized Phillips head screwdriver to avoid stripping screws or damaging the crib’s hardware․ Unlike the Allen wrench‚ this tool is typically not included‚ so make sure to have one readily available․ Avoid using power screwdrivers‚ as they may apply too much force and damage the crib․ Proper use of the Phillips head screwdriver is vital for a safe and successful assembly․

Assembly Process
The Bonavita crib assembly process involves following clear‚ step-by-step instructions to ensure a secure and sturdy structure for your baby’s safety and comfort․
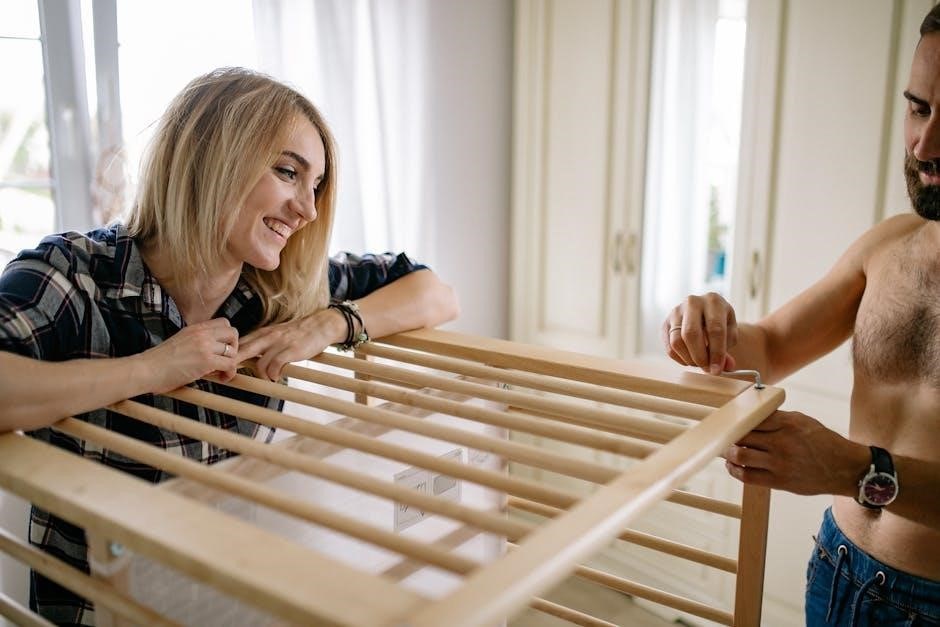
5․1 Attaching Side Panels
To attach the side panels‚ align the pre-drilled holes with the crib frame․ Use the included Allen wrench to secure the panels tightly․ Ensure the panels are level and properly aligned for stability․ Tighten all bolts firmly but avoid overtightening‚ which could damage the wood․ Double-check the alignment to ensure a snug fit․ If the panels feel loose‚ adjust and tighten again․ Properly attached side panels are crucial for the crib’s structural integrity and your baby’s safety․ Follow the manufacturer’s guidance for precise alignment and secure fastening․
5․2 Installing the Mattress Support
Install the mattress support by aligning its brackets with the crib frame․ Use the Allen wrench to secure it with the provided bolts․ Ensure the support is level and fits snugly within the crib․ Tighten the bolts firmly but avoid overtightening․ Double-check the support’s stability by gently pressing on it․ Proper installation ensures the mattress rests evenly‚ providing a safe and comfortable surface for your baby․ Refer to the instructions for correct height adjustment based on your baby’s age and needs․
5․3 Securing the Back and Front Rails
Attach the back and front rails to the crib frame by aligning the pre-drilled holes․ Use the Allen wrench to tighten the bolts securely․ Ensure the rails are evenly aligned and properly seated․ Tighten the bolts firmly but avoid overtightening‚ as this could damage the wood․ Double-check the rails for stability by gently shaking them․ Properly securing the back and front rails ensures the crib’s structural integrity and safety․ Refer to the manual for specific bolt locations and torque specifications to avoid errors during assembly․
Converting the Crib
Bonavita cribs convert from a crib to a toddler bed‚ daybed‚ or full-size bed‚ offering long-term adaptability for your child’s growing needs easily and safely․
6․1 Toddler Bed Conversion
Converting a Bonavita crib into a toddler bed involves removing the crib sides and attaching a toddler bed rail for safety and comfort․ This step-by-step process ensures a smooth transition‚ maintaining stability and security for your child․ The conversion typically requires the included Allen wrench and a Phillips head screwdriver․ Always follow the instructions carefully to avoid any assembly errors․ Ensure all bolts and screws are tightened properly to guarantee the bed’s stability․ The toddler bed rail provides a safe barrier‚ preventing accidental falls while your child adjusts to the new bed․ This feature-rich design makes Bonavita cribs a practical choice for growing families․
6․2 Daybed and Full-Size Bed Conversion
Bonavita cribs offer the flexibility to convert into a daybed or full-size bed‚ adapting to your child’s needs as they grow․ For the daybed‚ remove the toddler bed rail and attach the daybed conversion kit․ The full-size bed conversion requires additional hardware‚ such as a bed frame and slats‚ ensuring proper support․ Follow the instructions to secure all components tightly․ This multi-stage conversion process allows your child to transition smoothly from infancy to adulthood‚ making Bonavita cribs a long-term investment․ Always ensure the mattress fits perfectly for safety and comfort․

Safety Checks
Ensure the crib’s stability by checking all joints and connections․ Inspect for sharp edges or loose hardware that could pose a hazard to your child․
7․1 Ensuring Stability
To ensure the crib’s stability‚ check that all legs are evenly placed on a flat surface and that the frame is level․ Verify that all bolts and screws are tightly secured‚ and there are no loose connections․ Additionally‚ ensure the mattress fits snugly within the crib‚ with no gaps between the mattress and the sides․ A stable crib minimizes the risk of tipping or wobbling‚ providing a secure environment for your baby․ Regularly inspect the crib’s foundation to maintain its structural integrity over time;
7․2 Checking for Sharp Edges
Inspect the crib thoroughly for any sharp edges or rough surfaces that could harm your baby․ Pay particular attention to joints‚ corners‚ and areas around hardware․ Use a soft cloth or sandpaper to smooth out any rough spots․ Ensure all edges are rounded and safe for your child․ Sharp edges can pose a risk of injury‚ so addressing them is crucial before placing your baby in the crib․ This step ensures a safe and secure sleeping environment‚ aligning with the crib’s overall safety standards․
Common Mistakes to Avoid
Common mistakes include using incorrect tools‚ missing hardware‚ or improper alignment of parts‚ which can compromise the crib’s stability and safety for your baby․
8․1 Using Incorrect Tools
Using incorrect tools is a common mistake during crib assembly․ The Allen wrench provided is essential for securing bolts‚ while a Phillips head screwdriver is needed for other parts․ Avoid using power tools‚ as they may strip screws or cause misalignment․ Incorrect tools can damage hardware or compromise the crib’s stability․ Always refer to the instructions for the recommended tools to ensure a safe and proper assembly process․ Using the wrong tools can lead to a shaky structure and potential safety hazards for your baby․
8․2 Missing or Loose Hardware
Missing or loose hardware is another common issue during crib assembly․ Before starting‚ ensure all screws‚ bolts‚ and connectors are accounted for․ Loose hardware can lead to instability‚ posing safety risks for your baby․ If any parts are missing‚ contact the manufacturer immediately․ Double-check all connections during assembly to ensure they are tight and secure․ Properly tightened hardware is crucial for the crib’s structural integrity․ Avoid proceeding with assembly if any components are loose or missing‚ as this can compromise the crib’s safety and durability over time․

Troubleshooting
Troubleshooting during crib assembly involves identifying missing parts and addressing issues promptly․ Stay calm‚ refer to the manual‚ and resolve problems methodically to ensure a safe setup․
9․1 Identifying Missing Parts
Identifying missing parts is crucial before starting assembly․ Begin by carefully checking all boxes and bags against the inventory list provided in the manual․ Pay attention to small hardware items like screws‚ bolts‚ and the Allen wrench‚ which are often easy to overlook․ If a part is missing‚ contact the manufacturer immediately for a replacement․ Additionally‚ double-check the packaging to ensure no items were left behind․ Cross-referencing with the manual’s parts list can help confirm if something is missing․ If unsure‚ consult online resources or manufacturer support for clarification․ This step ensures a smooth assembly process without unnecessary delays․
9․2 Resolving Assembly Issues
If assembly issues arise‚ remain calm and systematically address the problem․ Refer back to the manual‚ ensuring each step was followed correctly․ If a part doesn’t fit‚ double-check its orientation and alignment․ For hardware issues‚ verify that the correct tools‚ like the Allen wrench or Phillips screwdriver‚ are used․ Tightening any loose connections may resolve stability concerns․ If problems persist‚ seek assistance from a partner or consult online communities for tips․ Manufacturer support is also available for troubleshooting‚ ensuring the crib is assembled safely and securely for your baby’s comfort and safety․
Additional Tips
Consider following video guides for visual clarity and seeking help from online forums if stuck․ Asking a partner for assistance can also simplify the process significantly․
10․1 Following Video Guides
Video guides are an excellent resource for assembling Bonavita cribs‚ offering step-by-step visual instructions that clarify complex steps․ Platforms like YouTube feature detailed tutorials demonstrating how each part fits together‚ which can be especially helpful for visual learners․ These videos often highlight potential pitfalls to avoid and provide a clear understanding of the process․ By pausing and replaying as needed‚ users can ensure accuracy and confidence in their assembly․ Additionally‚ video guides can help confirm proper alignment and safety features‚ making the assembly process smoother and safer for both the assembler and the child․
10․2 Seeking Help When Needed
If you encounter difficulties during assembly‚ don’t hesitate to seek assistance․ Consulting online forums or communities where users share their experiences can provide valuable insights․ Reaching out to friends or family with assembly experience is also beneficial․ Additionally‚ manufacturers often offer customer support‚ so contacting Bonavita directly for clarification can resolve issues quickly․ Remember‚ safety is paramount‚ and ensuring the crib is correctly assembled is worth taking the time to get right‚ even if it means asking for help․

Maintenance and Care
Regularly clean the crib with mild detergents and soft cloths to maintain hygiene․ Avoid harsh chemicals that might damage finishes․ Inspect hardware and joints periodically for wear․
11․1 Cleaning the Crib
To maintain your Bonavita crib‚ clean it regularly using a mild detergent and a soft‚ damp cloth․ Avoid harsh chemicals or abrasive cleaners‚ as they may damage the finish․ For tough stains‚ gently scrub with a non-abrasive sponge․ Sanitize using a solution of equal parts water and white vinegar․ Dry thoroughly to prevent moisture buildup․ Regular cleaning ensures a hygienic environment for your baby and preserves the crib’s appearance․ Always test a small area first to ensure cleaning products won’t damage the materials․
- Use a soft-bristled brush to dust crevices and corners․
- Spot-clean spills immediately to prevent stains․
- Check for and remove any loose debris before deep cleaning․
Regular maintenance ensures the crib remains safe‚ sturdy‚ and long-lasting for your child․
11․2 Regular Inspections
Regular inspections are crucial to ensure your Bonavita crib remains safe and functional․ Check all joints‚ screws‚ and bolts for tightness and stability․ Inspect for any signs of wear‚ such as cracks‚ dents‚ or loose hardware․ Verify that mattress support is secure and even․ Look for sharp edges or protruding parts that could pose a hazard․ Immediately address any issues found during inspections to maintain a safe environment for your baby․ Routine checks help prevent potential problems and extend the crib’s lifespan․
- Inspect hardware for looseness or damage․
- Ensure all parts are securely attached․
- Check for any signs of wear or tear․
Consistent inspections ensure your Bonavita crib continues to provide a safe and reliable space for your child․
Assembling your Bonavita crib with care ensures a safe‚ comfortable space for your baby․ Follow instructions closely and conduct regular inspections for lasting durability and peace of mind․
12․1 Final Thoughts
Completing the Bonavita crib assembly is a rewarding process that ensures your baby’s safety and comfort․ By following the instructions carefully and double-checking each step‚ you’ve created a sturdy‚ adaptable space that will grow with your child․ The crib’s durability and convertible design make it a long-term investment in your child’s sleep and development․ Remember to stay vigilant with regular inspections and maintenance to ensure ongoing safety․ Your effort and attention to detail will provide your baby with a secure and cozy environment for years to come․
12․2 Encouragement for Successful Assembly
Assembling a Bonavita crib can seem daunting‚ but with patience and attention to detail‚ you’ll achieve a safe and sturdy result․ Remember‚ every step you complete brings you closer to providing a secure and comfortable space for your baby․ Take pride in your effort‚ as this is a meaningful contribution to your child’s well-being․ If challenges arise‚ don’t hesitate to seek help or revisit the instructions․ Your dedication ensures a safe environment for years to come․ Celebrate this accomplishment—it’s a testament to your care and commitment!
Additional Resources
For further assistance‚ consult the manufacturer’s support or visit online forums where users share their experiences and tips for assembling Bonavita cribs successfully․
13․1 Manufacturer Support
Bonavita provides comprehensive manufacturer support for crib assembly‚ including detailed instruction manuals and customer service contact information․ Their official website often hosts downloadable PDF guides‚ ensuring easy access to assembly instructions․ Additionally‚ Bonavita may offer troubleshooting tips and conversion guides for adjusting the crib as your child grows․ Reaching out to their support team can resolve specific assembly issues or clarify confusing steps․ These resources are invaluable for ensuring a smooth and safe assembly process‚ making it easier for parents to create a secure environment for their baby․
13․2 Online Communities and Forums
Online communities and forums are excellent resources for Bonavita crib assembly instructions․ Platforms like YouTube offer detailed video guides‚ while forums such as Reddit and specialized parenting groups provide firsthand experiences and tips․ Many users share their assembly journeys‚ highlighting common challenges and solutions․ These communities can also offer alternative methods or workarounds for missing parts or unclear steps․ Additionally‚ some forums host downloadable manuals or conversion guides for cribs like the Bonavita Peyton or Metro models․ Engaging with these communities can provide valuable insights and support‚ ensuring a successful assembly process for your crib․