ford ranger trailer brake controller instructions
This guide provides step-by-step instructions for installing and configuring a trailer brake controller on your Ford Ranger, ensuring safe and efficient towing capabilities.
Overview of Trailer Brake Controllers
Trailer brake controllers are essential devices that regulate the braking system of a trailer when connected to a tow vehicle, such as the Ford Ranger. These controllers ensure synchronized braking between the vehicle and the trailer, enhancing safety and control while towing. They are typically mounted inside the vehicle and connected to the brake system, allowing the driver to adjust settings like braking sensitivity and delay. Modern controllers, such as the Tekonsha Prodigy P3 or Redarc Tow-Pro Elite, offer advanced features like proportional braking, which applies trailer brakes in sync with the vehicle’s deceleration. Compatibility with the Ford Ranger’s electrical system is crucial for proper functionality, and many controllers are designed to integrate seamlessly with the vehicle’s existing wiring and tow package configurations.
Importance of Proper Brake Controller Installation
Proper installation of a trailer brake controller is crucial for ensuring safe and reliable towing with your Ford Ranger. Incorrect installation can lead to unsafe braking performance, potentially causing accidents. It ensures that the trailer brakes engage smoothly and proportionally with the vehicle’s brakes, maintaining control during stops. Proper setup also prevents damage to the vehicle’s electrical system and the controller itself, avoiding costly repairs. Additionally, it guarantees compliance with legal requirements for towing, preventing potential fines. Correct installation enhances the longevity of both the vehicle and trailer braking systems, reducing wear and tear; It also ensures compatibility with the Ford Ranger’s advanced safety features, such as stability control, for optimal functionality. Proper installation provides peace of mind and confidence while towing, ensuring a secure connection and reliable performance on the road.
Compatibility of Brake Controllers with Ford Ranger
Ensuring the brake controller is compatible with your Ford Ranger is essential for seamless integration and optimal performance. Modern Ford Rangers, especially those with advanced towing packages, support a variety of brake controllers, including popular models like the Tekonsha Prodigy P3 and Redarc Tow-Pro Elite. These controllers are designed to work with the Ranger’s electrical system, providing precise control over trailer brakes. Compatibility is verified through the vehicle’s 7-way trailer connector, which is typically included in tow packages. Some models may require additional wiring harnesses or signal conditioning modules for proper functionality. It’s important to select a controller that matches the Ranger’s specifications to avoid electrical issues and ensure reliable operation. Always consult the vehicle’s manual or manufacturer guidelines to confirm compatibility before installation.
Pre-Installation Requirements
Verify vehicle specifications and ensure the tow package is installed. Understand the 7-way trailer connector and gather necessary tools and materials for a smooth installation process.
Checking Vehicle Specifications and Tow Package
Ensure your Ford Ranger is equipped with the correct tow package, including a factory-installed 7-way trailer connector. Verify the vehicle’s specifications for maximum towing capacity and electrical system compatibility. Consult the owner’s manual to confirm the presence of necessary features like trailer sway control and automatic emergency braking. For models without a tow package, additional wiring and hardware may be required. Check the location of the trailer wiring harness, typically found near the driver’s side kick panel or firewall. Ensure all components are compatible with your trailer brake controller to avoid installation issues. This step is crucial for a safe and functional setup, ensuring your Ranger is prepared for towing with a brake controller.
Understanding the 7-Way Trailer Connector
The 7-way trailer connector is a standardized plug used for connecting your trailer to your Ford Ranger’s electrical system. It provides power for trailer lights, brakes, and auxiliary functions. The connector includes seven pins: two for brake control, one for 12V power, and four for lighting functions (left turn, right turn, brake, and running lights). Ensure the connector is clean and free of corrosion to maintain proper connectivity. For Rangers equipped with a factory tow package, the 7-way connector is typically located near the rear bumper. If your vehicle doesn’t have one, consider installing it to ensure compatibility with your trailer brake controller. Proper understanding and maintenance of the 7-way connector are essential for safe and reliable towing operations.
Gathering Necessary Tools and Materials
To ensure a smooth installation of your Ford Ranger trailer brake controller, gather the following tools and materials: wire cutters, electrical tape, a multimeter, a screwdriver set, and a wrench for connector tightening. You may also need a drill and bits if mounting the controller or routing wires. For the wiring harness, ensure compatibility with your Ford Ranger’s electrical system; Additional materials like heat shrink tubing and dielectric grease can protect connections from corrosion. If your truck doesn’t have a factory tow package, you may need a 7-way trailer connector kit. Organize all components beforehand to avoid delays. Refer to your brake controller kit for specific requirements, as some may include pre-configured wiring or specialized connectors.
Installation Steps
Start by locating the brake controller wiring harness under the dash, then identify and connect the yellow and blue wires to the vehicle’s electrical system. Mount the controller unit securely and ensure all connections are tight and protected. Follow the manufacturer’s instructions for syncing and testing the system.
Locating the Brake Controller Wiring Harness
To locate the brake controller wiring harness, start by checking under the driver’s side dashboard. The harness is typically found near the steering column or tied back with blue electrical tape. On Ford Rangers equipped with the factory tow package, the harness is usually pre-installed and easily accessible. If your vehicle doesn’t have the tow package, you may need to purchase a compatible wiring kit. Ensure the harness is connected to the vehicle’s electrical system and trailer connector. For precise locations, refer to your Ford Ranger’s wiring diagram or consult a professional installer. Proper identification and connection of the harness are crucial for safe and effective trailer braking operation.
Identifying the Yellow and Blue Wires Under the Dash
Under the dashboard, locate the yellow and blue wires, which are essential for connecting the brake controller. The yellow wire typically powers the trailer brake lights, while the blue wire controls the electric brakes. Ford often tucks these wires near the steering column, folded and secured with blue electrical tape. Gently pull back the tape to access the wires. If they are not visible, consult your vehicle’s wiring diagram or a professional. Proper identification ensures correct installation and functionality. Once identified, use high-quality connectors to secure the wires to the brake controller, avoiding any damage or interference. This step is critical for ensuring reliable communication between your Ford Ranger and the trailer brakes.
Connecting the Wiring Harness to the Vehicle
Plug the wiring harness into the vehicle’s trailer brake controller port, typically located under the dashboard near the steering column; Ensure the connection is secure and free from moisture. Use weatherproof connectors for the trailer and vehicle battery terminals to prevent corrosion. Connect the positive (red) wire to the vehicle’s battery and the negative (black) wire to a suitable grounding point. Route the harness neatly, securing it with factory looms or zip ties to avoid damage. Double-check all connections for tightness and integrity. Test the system by activating the trailer brakes to ensure proper communication between the controller and the trailer. A faulty connection can lead to inconsistent braking performance, so careful attention is crucial during this step.
Mounting the Brake Controller Unit
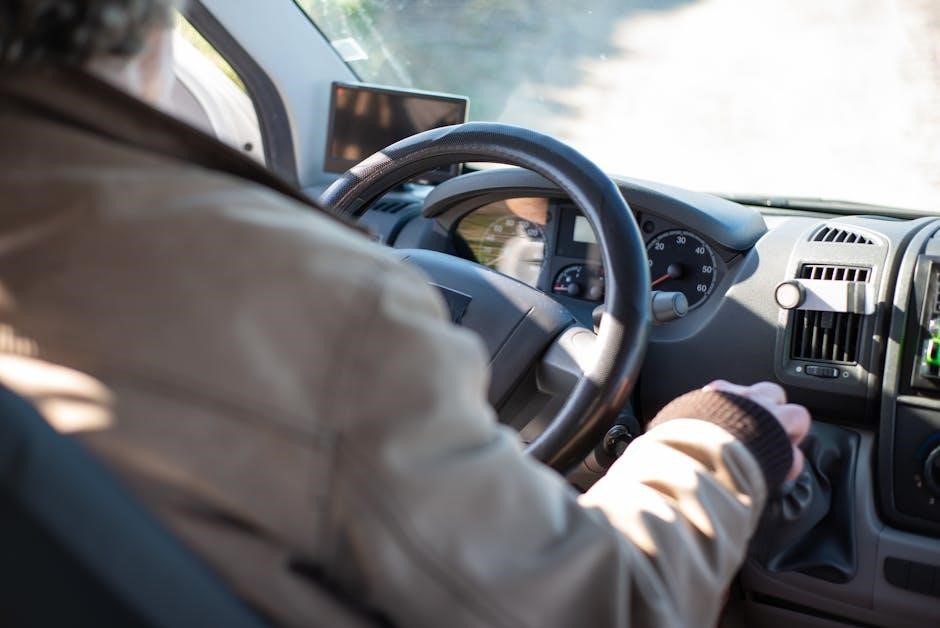
Mount the brake controller unit securely in an accessible location, typically on the driver’s side dashboard or near the steering column. Use the provided mounting bracket and screws to fasten it firmly to the dash. Ensure the unit is level and visible for easy adjustment while driving. Avoid obstructing the driver’s view or interfering with other controls. If necessary, drill holes for the screws, but be cautious not to damage any wiring or components behind the dash. Tighten the screws thoroughly to prevent movement during towing. For a cleaner install, use clips or adhesive-backed fasteners if provided. Finally, double-check the unit’s placement to ensure it is within reach and properly secured for safe operation.

Setup and Configuration
After installation, calibrate the brake controller by adjusting settings to sync with your trailer’s brakes, ensuring smooth and responsive braking performance while towing.
Adjusting Brake Controller Settings
Once installed, adjust the brake controller settings to optimize braking performance. Begin by setting the controller’s sensitivity and output levels based on your trailer’s weight and braking requirements. Use the manual override function to test the brakes independently. Ensure the controller is calibrated correctly by following the manufacturer’s guidelines, typically involving a series of acceleration and deceleration steps. Fine-tune the gain or sensitivity to achieve smooth, consistent braking without over- or under-braking. For integrated systems like the Ford Ranger’s Redarc Tow-Pro Elite, use the digital interface to customize settings. Always test the brakes with the trailer attached to ensure proper function and adjust as needed for safe towing.
Syncing the Controller with the Trailer Brakes
Syncing the brake controller with your trailer brakes ensures seamless communication and proportional braking. Start by connecting the trailer to the Ford Ranger and turning on the controller. Use the manual override function to test the trailer brakes independently. Adjust the controller’s output level to match the trailer’s brake response, ensuring smooth engagement without locking the wheels. Verify proper synchronization by accelerating and decelerating gradually, checking for consistent braking performance. For integrated systems like the Redarc Tow-Pro Elite, follow the manufacturer’s syncing procedure, which may involve calibration through a series of acceleration and deceleration steps. Once synced, test the system with a loaded trailer to ensure optimal braking performance under various conditions.
Testing the Brake Controller
After installation and configuration, thoroughly test the brake controller to ensure proper function. Start by activating the manual override to verify the trailer brakes engage independently of the vehicle. Check for proper brake light activation on the trailer and monitor the controller’s display for any error messages. With the trailer connected, perform a series of slow accelerations and decelerations to assess smooth braking response. Test with and without a load to ensure consistent performance. If equipped, use the Ford Ranger’s integrated systems to verify synchronization between the vehicle and trailer brakes. Address any inconsistencies by fine-tuning the controller settings or checking wiring connections. A successful test ensures safe and reliable towing operations.

Troubleshooting Common Issues
Identify and resolve common problems like wiring faults or calibration errors. Check connections, ensure proper wiring, and recalibrate settings. Address inconsistent brake performance by adjusting sensitivity or cleaning connectors.
Diagnosing Wiring Problems
Start by locating the yellow and blue wires under the dash, often taped together with blue electrical tape. Use a multimeter to test for voltage and continuity. Ensure the brake controller wiring harness is securely connected to the vehicle’s electrical system. Check the 7-way trailer connector for damage or corrosion, as this is a common source of issues. Test each pin with a multimeter to verify proper connections. Inspect the wiring for any signs of damage, such as cuts, frays, or rodent damage. Consult the wiring diagram to trace circuits and identify potential faults. Look for blown fuses in the fuse box that could disrupt power to the system. If issues persist, consider consulting a professional or Ford-specific wiring guides for detailed troubleshooting steps.
Resolving Brake Controller Calibration Issues
Start by ensuring the brake controller is properly paired with your Ford Ranger’s electrical system. Refer to the manufacturer’s manual for specific calibration steps. Adjust the controller’s output or gain settings to match your trailer’s brake response. Test the brakes by lightly applying them while monitoring the trailer’s reaction. If issues persist, check for loose connections or incorrect wiring, particularly in the yellow and blue wires under the dash. Use a multimeter to verify signal strength and continuity. Ensure the trailer is properly connected to the 7-way connector and all lights are functioning. If calibration issues remain, consult the controller’s troubleshooting guide or contact a professional for assistance. Proper calibration is crucial for safe and efficient braking performance.
Addressing Inconsistent Brake Performance
Inconsistent brake performance can often be traced to improper wiring connections or incorrect brake controller settings. First, inspect the yellow and blue wires under the dash for any signs of damage or corrosion. Ensure all connections are secure and not loose. Next, check the brake controller’s gain or output settings, adjusting them as needed to achieve smooth braking. Test the system by towing the trailer at various speeds and applying the brakes gently. If inconsistencies persist, verify that the trailer’s brake shoes are properly adjusted and functioning. Additionally, ensure the 7-way connector is clean and free of debris. If issues remain, recalibrate the controller or consult a professional technician to diagnose and resolve the problem effectively.

Maintenance and Upkeep
Regularly inspect and clean the 7-way connector and wiring. Check connections for security and damage. Ensure the brake controller is updated with the latest firmware for optimal performance.
Regular Inspection of Wiring and Connections
Regularly inspect the wiring harness and connections to ensure reliability. Check the 7-way trailer connector for corrosion or wear, and clean it if necessary. Examine the wiring under the dash, particularly the yellow and blue wires, for any signs of damage or fraying. Ensure all connections are secure and tighten any loose terminals. Inspect the brake controller mounting bracket for stability and verify that the unit is properly fastened; Use dielectric grease on electrical connections to prevent corrosion. Also, check the wiring harness near the firewall for any damage caused by heat or abrasion. If you notice any issues, address them promptly to maintain safe and consistent braking performance. Always refer to your Ford Ranger’s manual or consult a professional if unsure.
Updating Brake Controller Firmware
Regular firmware updates ensure your Ford Ranger’s trailer brake controller operates with the latest features and improvements. Check the manufacturer’s website for updates specific to your controller model. Download the update to a USB drive or use a smartphone app, depending on the manufacturer’s instructions. Connect the USB to the controller or sync via Bluetooth/Wi-Fi. Follow on-screen prompts to install the update, ensuring the process is not interrupted. After installation, test the brakes to confirm proper function. For Redarc controllers, updates are typically straightforward, while Tekonsha units may require specific software tools. Always refer to the user manual for detailed steps. Updated firmware enhances compatibility, improves braking performance, and ensures reliable towing experiences. Schedule updates annually or as notified by the manufacturer. This ensures optimal safety and functionality while towing with your Ford Ranger.
Cleaning and Protecting the Controller
Regular cleaning and protection of your Ford Ranger’s trailer brake controller are essential for maintaining its performance and longevity. Use a soft, dry cloth to wipe down the unit, removing dirt, dust, or moisture. Avoid harsh chemicals or abrasive materials that could damage the surface. For electrical contacts, lightly clean with an alcohol-based wipe to ensure proper connectivity. Protect the controller from direct sunlight, extreme temperatures, and moisture by installing it in a shaded, dry area. Apply a protective coating or cover when not in use to prevent dust buildup. Regular inspections ensure all components remain in good condition. Proper maintenance prevents corrosion and ensures reliable operation, keeping your towing setup safe and efficient. Cleaning and protection are simple steps that enhance the controller’s durability and functionality over time.
By following these instructions, you’ll succeed in installing, configuring, and maintaining your Ford Ranger’s trailer brake controller, ensuring safe and efficient towing every time.
Final Checks Before Hitting the Road
Before towing, ensure all connections are secure and properly plugged in. Test the trailer brakes independently and in sync with the vehicle’s brakes. Verify the brake controller settings are correctly adjusted for your trailer’s weight and configuration. Check the vehicle’s tow package and wiring for any damage or loose connections. Ensure the trailer’s 7-way connector is clean and free of corrosion. Perform a test drive in a safe area to confirm smooth braking performance. Refer to your Ford Ranger’s manual for specific guidelines. Always conduct a pre-trip inspection to avoid issues on the road. Proper preparation ensures a safe and hassle-free towing experience.
Best Practices for Long-Term Reliability
For long-term reliability, regularly inspect the brake controller wiring and connections, ensuring they are clean and secure. Protect the controller from moisture and extreme temperatures. Update the brake controller firmware periodically to maintain optimal performance. Avoid overloading the trailer beyond its rated capacity, as this can strain the braking system. Store the vehicle and trailer in a dry, covered area when not in use to prevent corrosion. Schedule annual maintenance checks for the tow package and braking system. Follow the manufacturer’s guidelines for replacement parts and accessories. By adhering to these practices, you can ensure your Ford Ranger’s trailer brake system remains reliable and efficient for years to come. Consistent upkeep is key to safe and trouble-free towing experiences.